

Welcome to our blog! In today’s post, we will provide a detailed guide on how to connect to Home Assistant using SSH. Many users search for this information online but often struggle to find accurate and complete instructions. That’s why we have compiled everything you need to know in one place.
Home Assistant is a powerful open-source home automation platform that enables users to control and automate a wide range of smart devices and services. One of the most efficient ways to access and manage Home Assistant is through Secure Shell (SSH), a protocol designed for securely connecting to remote devices over the internet. By using SSH, you can perform advanced configurations, troubleshoot issues, and enhance the overall functionality of your Home Assistant setup.
Stay with us as we guide you through the step-by-step process of setting up and using SSH with Home Assistant.
How to Connect to Home Assistant via SSH – Step-by-Step Guide
In this guide, we will walk you through the process of connecting to Home Assistant using SSH. SSH (Secure Shell) allows users to securely access and manage Home Assistant remotely, making it an essential tool for advanced configurations and troubleshooting.
Step 1: Enable SSH in Home Assistant
Before you can connect to Home Assistant via SSH, you must enable SSH access in the configuration settings. Follow these steps:
- Log in to your Home Assistant web interface through your browser.
- Navigate to the Configuration tab on the left-hand menu.
- Select General from the available options.
- Scroll down to locate the SSH section.
- Toggle the SSH switch to the “On” position.
- Click Save to apply the changes.
Step 2: Find the IP Address of Your Home Assistant Device
To establish an SSH connection, you need to know the IP address of your Home Assistant instance. Here’s how to find it:
- Log in to the Home Assistant web interface.
- Click on the Supervisor tab from the left-hand menu.
- Select System from the menu options.
- Click on the Host system tab.
- Locate the IP address under the Network section.
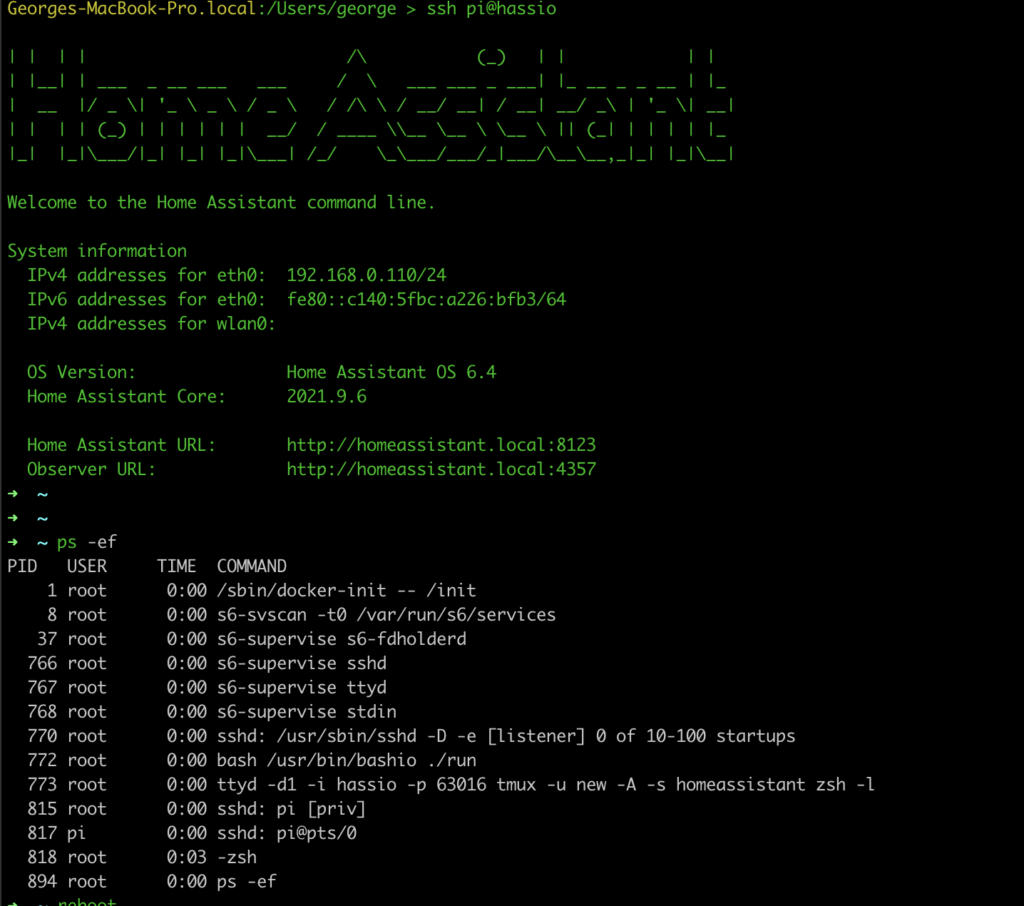
Step 3: Connect to Home Assistant via SSH
Once SSH is enabled and you have the IP address, you can establish a connection using a terminal program. There are multiple ways to do this, but the most common method is through a command-line interface (CLI) such as:
- Windows: Use PuTTY or the built-in Command Prompt (cmd) or Windows Terminal.
- Mac & Linux: Use the Terminal application.
To connect, enter the following command in your terminal:
bashCopyEditssh your-username@your-homeassistant-ip
Replace your-username with your actual SSH username and your-homeassistant-ip with the IP address you retrieved earlier.
Follow the on-screen prompts to complete the connection.
Connecting to Home Assistant via SSH on Windows
If you are using Windows, you can connect to Home Assistant via SSH using either the built-in Command Prompt or a third-party terminal application like PuTTY.
Method 1: Using Command Prompt
Follow these steps to connect using the Windows Command Prompt:
- Press Windows + R to open the Run dialog box.
- Type cmd and press Enter to launch the Command Prompt.
- Enter the following command, replacing
[username]with your Home Assistant username and[IP address]with your Home Assistant’s IP address:bashCopyEditssh [username]@[IP address] - Press Enter and provide your Home Assistant password when prompted.
Method 2: Using PuTTY
If you prefer using PuTTY, follow these steps:
- Download and install PuTTY from the official website.
- Open PuTTY.
- In the Host Name field, enter your Home Assistant’s IP address.
- Set the Connection Type to SSH.
- Click Open to initiate the connection.
- When prompted, enter your Home Assistant username and password to log in.
By following these methods, you can successfully establish an SSH connection to Home Assistant on Windows. Would you like additional troubleshooting tips for common SSH connection issues?
Connecting to Home Assistant via SSH on Mac and Linux
If you are using a Mac or Linux computer, you can easily connect to Home Assistant via SSH using the built-in Terminal application.
How to Connect via Terminal
- Open the Terminal on your computer.
- Type the following command, replacing
[username]with your Home Assistant username and[IP address]with your Home Assistant’s IP address:bashCopyEditssh [username]@[IP address] - Press Enter and input your Home Assistant password when prompted.
Step 4: Managing Home Assistant via SSH
Once connected to Home Assistant via SSH, you can execute various commands to manage and configure your system. Here are some essential SSH commands:
- Restart Home Assistant Core:bashCopyEdit
ha core restart - Stop Home Assistant Core:bashCopyEdit
ha core stop - Start Home Assistant Core:bashCopyEdit
ha core start - Restart Home Assistant Supervisor:bashCopyEdit
ha supervisor restart
By using these commands, you can efficiently control and troubleshoot your Home Assistant setup via SSH.
Would you like additional guidance on advanced SSH configurations or troubleshooting common SSH connection issues?
Frequently Asked Questions
What is SSH, and why should I use it with Home Assistant?
SSH (Secure Shell) is a protocol that allows you to securely access and manage your Home Assistant system remotely. It is useful for troubleshooting, running commands, and configuring advanced settings.
How do I enable SSH access in Home Assistant?
To enable SSH in Home Assistant:
- Navigate to Configuration > General in the web interface.
- Locate the SSH section and toggle it On.
- Click Save to apply the changes.
How do I find my Home Assistant’s IP address?
- Open the Home Assistant web interface.
- Go to Supervisor > System > Host System.
- Your device’s IP address will be listed under the Network section.
How can I improve SSH security for Home Assistant?
- Change the default SSH port (from 22 to another number).
- Use SSH key authentication instead of passwords.
- Disable root login for SSH.
- Enable firewall rules to restrict SSH access.
Can I access Home Assistant via SSH from my smartphone?
Yes, you can use SSH client apps like JuiceSSH (Android) or Termius (iOS) to connect to Home Assistant remotely.
Conclusion
Connecting to Home Assistant via SSH provides a secure and efficient way to manage, troubleshoot, and configure your smart home system. By enabling SSH access, finding your Home Assistant’s IP address, and using the appropriate terminal or SSH client, you can establish a seamless connection from Windows, Mac, or Linux. Whether using Command Prompt, PuTTY, or Terminal, SSH allows you to execute essential commands, such as restarting, starting, or stopping Home Assistant services.